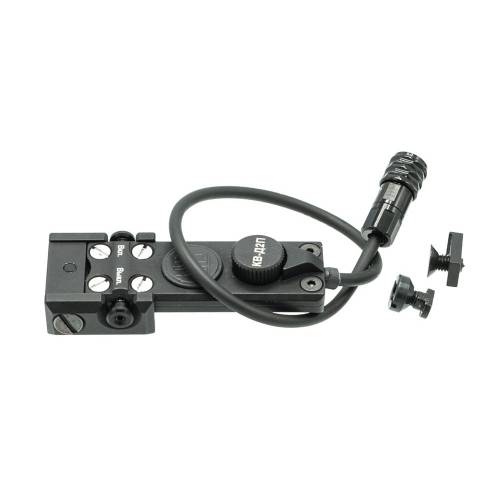
Brand: Zenitco
Product Code: ZNT-0004
Short descriptio
Remote button KV-D2P with attachment to the rail Basis and the bar Picatinny rail is intended for: combined devices: "Finger-4", starting with version 3.0; Finger-4M since version 3.0, Finger-4P since version 3.0, F... Read more...
$149.00
- Availability: In Stock
Remote button KV-D2P with attachment to the rail Basis and the bar Picatinny rail is intended for:
Mounted on:
Warranty period: 12 months
Completeness of delivery:
1 pc.
To install Remote button plugs KV-D2P it is necessary:
- combined devices: "Finger-4", starting with version 3.0; Finger-4M since version 3.0, Finger-4P since version 3.0, Finger-3 since version 2.0, Finger-2 since version 2.0;
- lights: "Tick-1", starting from version 2.0, "Tick-1 + LTSU" (all versions), "Tick-2", starting from version 2.0, "Tick-2PS + LTSU", starting from version 2.0, "Klesh-2P", starting from version 2.0, "Klesh-2D", starting from version 2.0 "," Klesh-2U ", starting from version 2.0," Klesh-2P-IK ", starting from version 2.0," Klesh- 2D-IK ", starting from version 2.0," Kleshch-2U-IK ", starting from version 2.0.
With lamps and combined devices of earlier versions KV-D2P is incompatible. The version name is indicated in the product name. If the version is not specified, then it is an earlier version.
Construction and operation of KV-D2P:
The KV-D2P remote button performs the same function as the buttons on the product body. The rotary switch is designed to adjust the brightness.
Made of D16T alloy with black coating.Mounted on:
- Picatinny rail : by means of an additional bracket consisting of two clamping bars, a central clamp and a stopper in the middle.
- Guide Base: using a cam clamp or a hook clamp.
Warranty period: 12 months
Completeness of delivery:
1 pc.
| Remote button KV-D2P | 1 pc. |
| additional bracket for mounting on the Picatinny rail | 1 piece |
| cam clamp | 1 piece |
| claw clamp | |
| operation manual | 1 pc. |
To install Remote button plugs KV-D2P it is necessary:
- Connect the KV-D2P button to the product by plugging the plug into the connector, after removing the rubber pad and aligning the contact parts. To detach the button, grasp the retaining ring on the connector and pull it towards you.
- Place the button in the desired location on the carabiner.


 Airsoft Rifles
  Optical & Collimator sights
  Equipment
  Clothing
  Improvement
  Cosplay
  SpeedSoft
  Souvenirs